Well, ever since we tasted the pleasures of a launch experience of the Falcon Heavy in Florida, as described in our posts of February 8, 2018 and a previous attempt at photographing a launch from Vandenberg on February 24, 2018, we decided that it was time to actually travel to Vandenberg Air Force Base (VAFB) and witness up close the launch of a SpaceX Falcon 9 on October 7, 2018.
So, I met up with OCA Science Nerds and Theatre Impresarios, Scott and Sandy, in Lompoc and made our way to the VAFB Hawk's Nest public viewing site. We knew the site would be open for entry between 5:00 and 7:00 PM, for the scheduled 7:22 PM launch, but we weren't sure what type of parking for crowds we should plan for. As it turned out, we drove to the site about 4:00 PM and found we were in a line of cars about 0.3 miles long, waiting to enter the site. When the time came for the gates to be open, the VAFB military police did an excellent job of ushering all of us in, where we found easy parking and we only had to walk a couple of blocks to the grassy viewing area. Thanks to all the VAFB security personnel for the great viewing opportunity and shepherding of all of us observers!
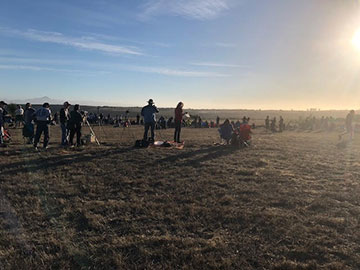
While we were there we met up with some other OCA members, Astroimagers and Eclipse Followers, David and Jean. So you can see in the photo below, taken just before sunset, where we set up, with Scott and Sandy, about mid picture, with my tripod to the left and further left still is where David and Jean setup. David, as a serious and experienced astrophotographer came equipped with a whole forest of tripods, well maybe four or five tripods and cameras. Thanks for all your help and fun and good to see everyone, Scott, Sandy, David, and Jean!
By the way, you might want to take a look at David's fantastic website for his astrophotos and his launch photos when they show up there at: astrocamera.net.
 |
| The crowd begins to grow and setup facing the VAFB launch site, T0 - 1 hour, 53 minutes (Source: Palmia Observatory) |
This Falcon 9 launch was the first from VAFB where the first stage booster rocket returned to the launch pad and made a landing in the old fashioned way as done in sci-fi movies of the 1950's. The launch and return of the booster is a key innovation that is continuing to reduce the cost of getting into space. The purpose of this launch from VAFB was to put Argentina's SAOCOM-1A into a sun-synchronous orbit. For future upcoming launches, you can check out the Eagles' Nest location in the following map found on the VAFB Facebook page.
 |
| Hawk's Nest observation site near VAFB (Source: VAFB Facebook page) |
Ok, let's now take a look at nine photos of the launch. The first eight were taken at the Hawk's Nest and the last one was taken in Orange County. I think we were about 9 miles from the launch site and after the sun went down and the launch site lights were on, you can make out the Falcon 9 in the image below. Each photo caption includes my best estimate of the time the photo was taken with the first photo of the launch being designated as time "T0".
 |
| Falcon 9 on the VAFB launching pad, 300mm, enlarged/cropped, T0 - 6 minutes (Source: Palmia Observatory) |
 |
| Falcon 9 ignition on the VAFB launching pad, 1/30 second, 300mm, T0 (Source: Palmia Observatory) |
 |
| Falcon 9 liftoff on the VAFB launching pad, 300mm, 1/30 second, T0 + 7 seconds (Source: Palmia Observatory) |
 |
| Falcon 9 after the VAFB launch, 300mm, 1/2500 second, T0 + 46 seconds (Source: Palmia Observatory) |
In this image, about 2 minutes after launch, the rocket exhaust plume is really starting to spread out. As time went on, the plume was just to big to fit in my 300mm, and even my 75mm, field of view. You can spy several glowing objects after the 2nd stage ignited and separated in this image too.
 | |
|
So, even as the 2nd stage rocket continues on its path to orbit, the first stage booster goes through a controlled descent and comes back to land vertically, just the same as it launched, just a few hundred feet from the original launch pad. Pretty neat stuff, Elon!
 | |
|
Ok, the booster is on the ground and the final glow shows up as the engine shuts down.
 | ||
|
 |
| Falcon 9 2nd stage continues from VAFB, 75mm, 1/60 second, T0 + 10 minutes, 27 seconds (Source: Palmia Observatory) |
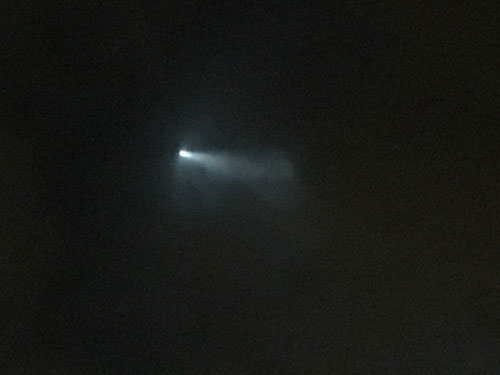
Finally, we know that the rocket launch was observed from other areas far and wide. Even though Resident Astronomer, Peggy, who could not be at the launch site as she was busy caring for Great-nephew, Jackson, while his mother is on international business travel, Peggy did manage to capture this image on her cellphone in Orange County. Thanks for that, Peggy!
 |
| Falcon 9 launch from VAFB was visible, in between clouds, in Orange County (Source: Peggy/Palmia Observatory) |
Wow so those are the camera images! The experience of the launch was just fantastic. When we heard the countdown clock reach zero and saw the sky begin to glow, all was silent except for the oohs and ahs of the crowd. Then shortly thereafter we heard the rocket's roar which made the event even more real. There was so much happening as the 2nd stage continued on higher and higher and the first booster stages was seen firing and descending back to just a short distance from the launching pad. After the rocket touched down, we then heard what seemed like a series of sonic booms. Still the 2nd stage could still be seen going higher to launch its satellite payload.
Trying to photograph the launch resulted in some missteps and some lessons learned.
Lesson Learned #1. Check your camera batteries before getting close to launch time. My DSLR battery indicator started flashing at about 9 minutes before launch and I had to quickly take the camera off the tripod, without upsetting the red dot finder positioning and the lens focus setting.
Lesson Learned #2. Some other piece of equipment, normally quite reliable, might fail during the critical time. In this case, I had been turning the red dot finder off during the two hours before the launch, to save the battery, but when I went to turn it back on about 10 minutes before the launch, the darn on/off/intensity knob broke off. Luckily, I caught it in my fingers and was able to twist and jamb it back on in order to turn the red dot finder back on.
Lesson Learned #3. I selected my 75-300mm DSLR lens and thought that that would give me enough field of view variations. Well, the 300mm setting was a bit to wide for the rocket on the launchpad and the minimum 75mm setting was just a bit to narrow for some of the later rocket exhaust and plume photos. Maybe a 18-55mm lens would have been a better choice.
Lesson Learned#4. Always check your ISO setting as it might be different from it usually is. Yes, in this case the ISO was set to 12,800, apparently for some previous investigation I was doing, and I forgot to check the setting until after all of the launch photos had been completed. Hmm, that is going to make the pictures pretty graining and noisy.
Lesson Learned #5. Always check the range of motion of the camera tripod to ensure you can see the rocket on the launch pad and at the highest point in the sky. In this case, as the rocket climbed higher and higher, I had to drop down on my knees to match up the red dot with the rocket. In addition, the tripod almost ran out of range of motion and I thought I would have to manually tilt the whole thing backwards to still follow the rocket.
Lesson Learned #5. Consider including a video camera and recorder in you launch experience. I lost track of when we could first hear the rocket engines roar and when we first heard the sonic booms following the return landing of the first stage.
Until next time,
Resident Astronomer George
There are over 200 postings of similar topics on this blog
If you are interested in things astronomical or in astrophysics and cosmology
Check out this blog at www.palmiaobservatory.com

No comments:
Post a Comment