Well this was supposed to be a week to get some pictures of the Blue Moon, but the weather was too cloudy, except for one brief solar observation trial, so there was some time to review gravity and general relativity in time for the upcoming Hartle Fest and mention the slowest pulsar yet discovered.
Now I don't know Professor Hartle, other than recognizing him at various conferences and venues, but of all of the introductory textbooks, his is one of the best.
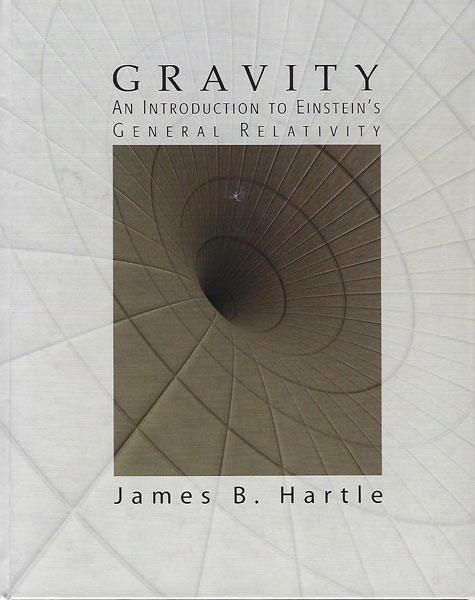 |
| For a gentle introduction to General Relativity get James Hartle's "Gravity..." |
So, while waiting for the clouds to dissipate, I found two concepts that illustrate the way in which observations made by different observers depend very much on the speed of the observer, as calculated by special relativity, and in what gravitational field, or equivalently in an accelerated frame of reference, the observations take place in.
The first effect comes from observations of gas clouds moving away from quasars or other objects at high speeds. Measurement of the distance between the initial galaxy and the speeding away clouds seems to indicate that the clouds must be moving faster than the speed of light. Check out the diagram, from Hartle's textbook, which finds the clouds seem to be moving away at something like 10 times the speed of light. How can this be? What is the explanation?
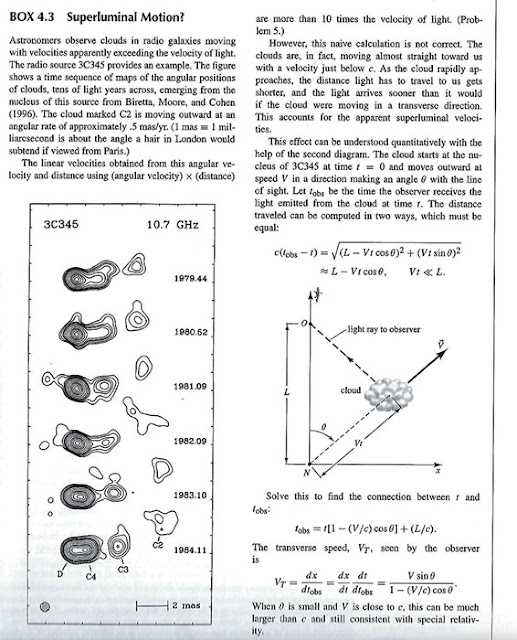 |
| Measurement of "superluminal motion" explained (Source: Hartle, "Gravity, An Intro to Einstein's GR") |
Well if you read the text associated with the diagram on the right hand side of the panel you see that the apparent speed of separation is just an illusion. The clouds are not moving perpendicular to our line of sight, but are instead moving at very high velocity towards us. So, if you trace the light ray shown arriving at point O, which represents us the observer, then keep extending that line of sight down to the x-axis, you can see right away that the angle of observation and assumption that the clouds are along the x-axis, that the separation distance would be misinterpreted. The calculation just shows what the real separation distance can be. Pretty neat!
 |
| Time delay of radio signals or light by gravitational effects (Source: Hartle, "Gravity, An Intro to Einstein's GR") |
So, what we see is that to make sense of many observations in the laboratory or in the cosmos, it is necessary to incorporate the effects predicted by special and general relativity. The situation is illustrated in the diagram, again taken from Hartle's textbook, below.
 | |
|
Well, enough of GR for now, as we have to get cracking on what type of camera system to take to Chile for the upcoming total solar eclipse, which is now just a bit more than a month away. My emphasis on taking photos during the eclipse has never been to do it in a professional way that would require taking possible hundreds of pounds of equipment on the airplane. My choice at this time is pretty much down to the lightweight non-tracking tripod, shown below, with a mirrorless camera, with 55-200mm telephoto lens for the eclipse and another 15-45mm wider angle lens. Also, a red dot finder, mounted on a dual camera tripod bar can be used during the eclipse photography and during nighttime photography of the Large and Small Magellanic Clouds and Milky Way during our stay in the Atacama Desert. My main goal is to experience the eclipse and of course see the sites and observatories, but also to take some photos of the events too.
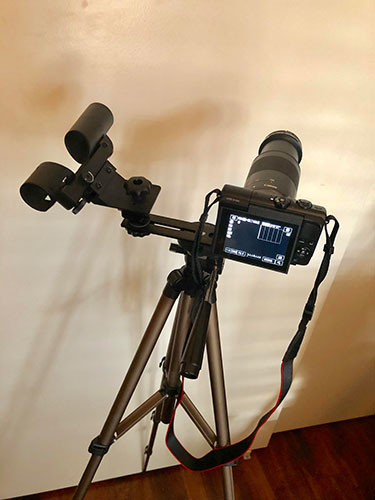 |
| This lightweight tripod, camera and red dot finder is the initial eclipse chasing set (Source: Palmia Observatory) |
Hmm, yes, it would be nice to have a tracking mount and a larger telephoto lens, maybe even 600mm, and maybe even a good separate movie camera on its separate mount, but, no, there will be plenty of professional photos and movies, so my goal is just to have a lightweight system that is easy to carry and setup and serve dual purpose for nighttime observing too!
But, let's make sure that this setup will work and we will be happy with the images, if everything works and we don't get clouded out. So, we are scheduling some practice observing sessions to try everything out and make sure I know where the camera controls are and how to quickly change the exposure setting etc., so that during the eclipse every possible camera setting has been rehearsed. Now, if only those pesky clouds would just move aside for a little practice on the visible sun.
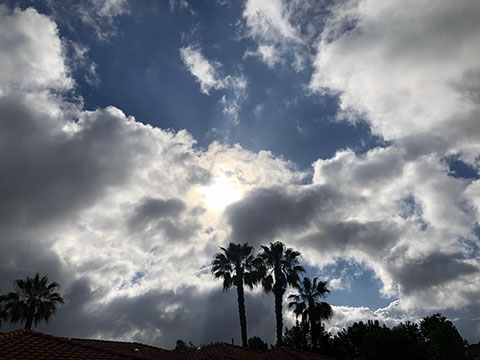 |
| If the sun pokes trough the clouds, we can practice eclipse photography (Source: Palmia Observatory) |
So, as soon as a hole appeared in the clouds, I carried the whole tripod and camera setup outside and within a couple of minutes was able to take a photo of the sun. The sun seemed to be more quiet today and no sunspots were visible. The image below shows the initial use of the red dot finder to align the camera line of sight. In the past I have used a different device (Sol Searcher) which would show the image of the sun on a phosphor screen, so you wouldn't have to look at the sun, but somehow I had misplaced that device and decided to use plan B, which was the red dot finder shown in the photo and you can how the shadow through the cylinders shows when the sun and optical axis are aligned.
 |
| Using the inactive red dot finder shadow to find the sun (Source: Palmia Observatory) |
With telephoto lens set to maximum 200mm and the ND100000 filter in place, the sun shows up in this camera full frame view.
 |
| Full frame image of the sun, 200mm, 1/500 second (Source: Palmia Observatory) |
So, you see that it would be nice to have a little more focal length to get more of the sun in the camera field of view, but at least more of the solar background and corona and background stars should also show up during the eclipse observations. The image can be expanded and cropped to what kind of detail is possible with the 200mm lens and that image is shown below. Hmm, maybe there is some overexposure going on here. Darn, maybe 1/1000 second would have been better!
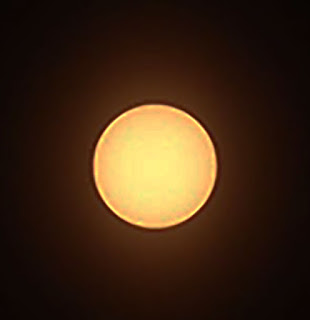 |
| Expanded view of 200mm M1000 overexposed frame showing some JPEG resolution issues (Source: Palmia Observatory) |
So, this first eclipse practice session, with this combination of tripod and camera, turned out pretty good. Lessons learned and future actions include:
- The passive use of the red dot finder to find the sun worked great. So, we can use the red dot finder during the daytime and then use the same equipment, in active mode, at night to align to the visible LMC and SMC targets as well.
- The 200mm telephoto lens for the M1000 is ok, but it would have been nice to have maybe 300-400mm focal length for more detail of the sun. But the 200mm should be ok to capture some of the corona during the eclipse. A separate 15-45mm lens will be used for Milky Way wide angle shots.
- The trial image seems a bit overexposed. I probably need a better habit of bracketing exposure times over some range so to ensure that some images will be just right.
- There were no sunspots present at this time so focusing was attempted by just looking at the edge of the sun. The M1000 has a magnify function so that you can zoom in to any particular area and get close up view of some artifact.
- The JPEG format can be wi-fi downloaded to an iPhone, but to get access to the RAW files is not planned for at the eclipse site due to the need for a laptop compute. So, image resolution in the field will be limited.
Finally, now that the clouds have pushed us back inside, there was an interesting article on Astrobites (See the main blog page for the website reference) by Aaron Pearlman, "Radio Pulsars: How slow do they go?", describing the discovery by LOFAR radio array of a pulsar with very slow pulse rate of 26.5 seconds. Now that is slow and is the slowest found so far.
Remember that LOFAR (Low-Frequency Array) is a radio telescope in the Netherlands. The array is composed of about 20,000 small antennas and can scan the sky over a relatively low portion of the RF band from about 10 to 240 MHz. LOFAR can operate as a phased array antenna and the received beam can be electronically steered to any available sky location.
 |
| Main installed base of LOFAR (Source: LOFAR/ASTRON) |
The discovery of J0250+5854 is plotted on the following pulse-period diagram and you can see that this new pulsar is the slowest found so far. Pulsars continuously slow down because they lose energy as the magnetic field interacts to produce the radio emissions. As I recall it seems the magnetic field of the pulsar also loses strength as the rotation rate slows down.
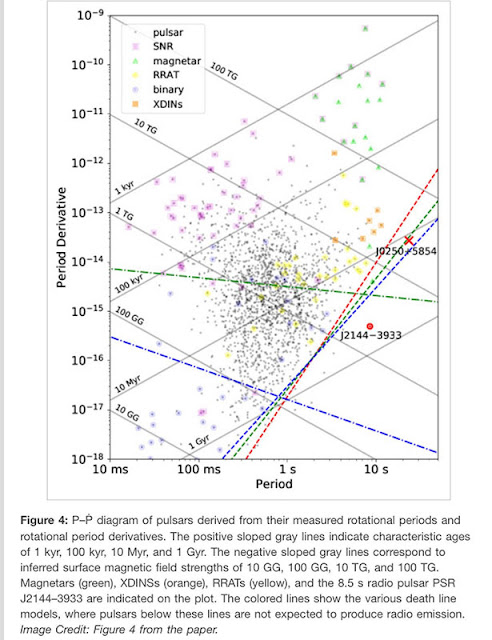 |
| Pulse-Period Diagram including the latest slow pulsar J0250+5854 (Source: Tan, et al, 1809.00965v1, 4 Sep 2018) |
The astrophysical process that generate the radio emission as the pulsar rotates can be observed over a wide frequency range. The original paper describes how the bimodal aspect of the pulse peak can be used to delve deeper in the radio generating processes.
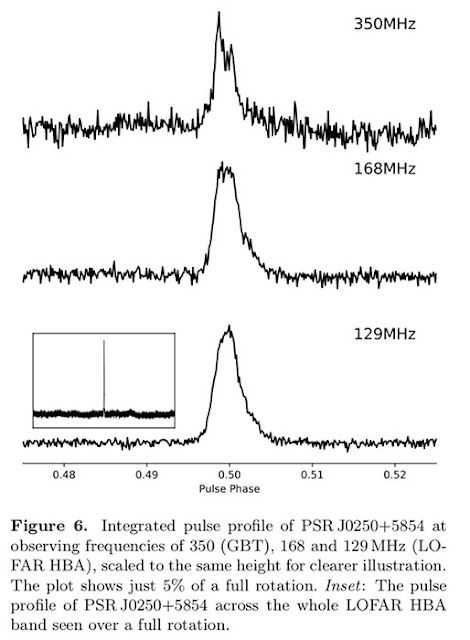 |
| Pulse-Phase Diagram, folded at 26.5 seconds, shows J0250+5854 pulse over wide frequency range (Source: Tan, et al, 1809.00965v1, 4 Sep 2018) |
Until next time,
Resident Astronomer George
Be sure to check out over 300 other blog posts on similar topics
If you are interested in things astronomical or in astrophysics and cosmology
Check out this blog at www.palmiaobservatory.com

No comments:
Post a Comment