Greetings from Palmia Observatory
Well this week we are revisiting some spectroscopy work done way back in January 2018 for the purpose of preparing a presentation at the OCA Astrophysics SIG.
For the more technical part of the presentation check out the blog post of June 10 (Edited 6/10/23) for those details.
Initially, we procured a SA-100 Star Analyzer, which is a diffraction grating in 1.25 inch filter format and can be installed in a telescope filter wheel or installed on a DSLR with a threaded adapter. The details of that early work are found in the five years ago January 2018 blog post at: http://www.palmiaobservatory.com/2018/01/wakefield-technology-offers-1000-times.html
We elected to use the SA-100 instead of the more capable Shelyak LISA spectrometer because that spectrophotometer requires a lot of telescope mount setup with alignment and guiding capability, which was considered too difficult for a demonstration at the Astrophysics SIG. The LISA spectrophotometer is shown in the photo below for reference. The LISA fits into a 2 inch telescope tube barrel and has two CCD cameras; one for imaging and one for guiding to keep the celestial object fixed on the spectrometer slit.
 |
| Shelyak LISA Spectrophotometer (Source: Palmia Observatory) |
The SA-100 diffraction grating is available from Tom Field at Rspec-astro with details as shown at their website: https://www.rspec-astro.com/
In this photo we see the SA-100 and threaded adaptor mounted on a DSLR.
 |
| Mounting SA-100 Star Analyzer on DSLR (Source: rspec-astro.com) |
For our first attempt let's go outside and take a look at the sun and get its spectra as well. Here we see the SA-100 mounted on a DSLR and the flimsy tripod with neutral density solar filter. The cardboard tube holds the solar filter fixed while still allowing some adjust of the focus wheel and positioning the SA-100 so the spectra is aligned horizontally in the camera image. We get the Resident Astronomer's shadow as an additional feature in the photo.
 |
| Going outside with SA-100 with solar filter on DSLR (Source: Palmia Observatory) |
This first solar image is taken without the SA-100 in place and we can see right away that there is at least one big sunspot on the sun today.
 |
| Solar image, with sunspot, 300mm DSLR, 1/4000 second (Source: Palmia Observatory) |
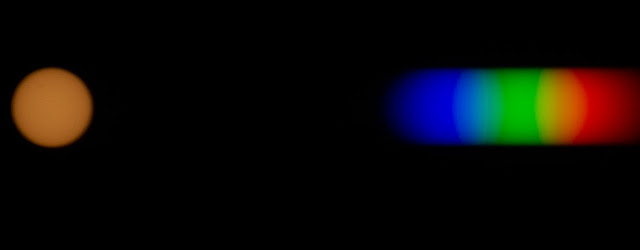
Now with solar filter still in place and the SA-100 re-installed we collect our first spectra since our first attempt back in 2018. So this is our first hint as to how the spectra of objects will be displayed. The spectra is arranged with the shorter wavelength light at the left "blue" edge and the longer wavelength light at the "red" right edge.
 |
| Solar image with SA-1000, 300mm DSLR, 1/1000 sec (Source: Palmia Observatory) |
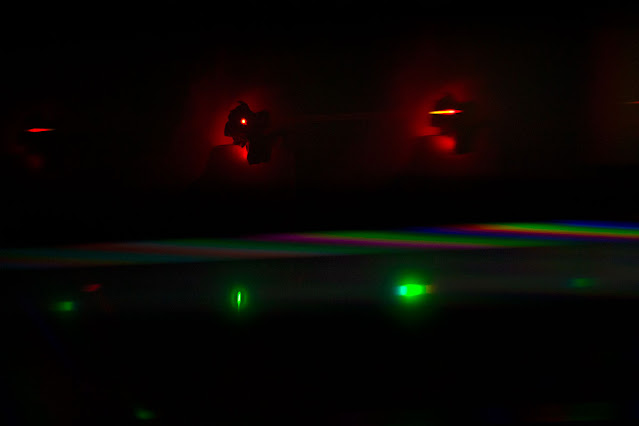
Just for fun we setup the SA-100 and DSLR in a darkened area and took images of some visible LED lights. The green light, a LED behind a diffusing lens, was on a Tesla wall charger and the red light was made from a red light flashlight with a covering with just a small pinhole.
The 1/30 second exposure time is long enough that we can see some reflections from other objects in the room and light that leaks out and around the red flashlight. We also can see the normally dimmer spectra image on the left hand side of the image. The diffraction grating design normally shows the brighter spectral image to the right and the much dimmer spectral image on the left. These two versions are called the "order of the spectra." In the future we will use shorter exposure settings so that the primary, brighter order only shows up on the right side of the image.
We also note that the red light spectra does indeed show up more towards the right side than does the shorter wavelength green light.
 |
| Red and Green LEDs as seen with SA-100, DSLR, 110mm, 1/30 sec (Source: Palmia Observatory) |
Ok, so now maybe we are ready to continue gathering some stellar test images for spectroscopic analysis. One of the first things we need to do is calibrate our spectral images so that we can convert pixel location to an estimate of the wavelength of the light. See the screenshot below taken from the getting started manual which can be found at: https://www.rspec-astro.com/download/Getting%20Started%20in%20Astronomical%20Spectroscopy%20using%20RSpec.pdf
A good calibration star is one with mainly hydrogen spectral lines. We will search for a good Type A star like Sirius or Vega when the clouds go away.
 |
| Turn pixel locations to wavelengths using Type A star for calibration (Source: www.rspec-astro.com) |
Now it is not obvious how convert this spectrum into a calibrated image which converts pixels to wavelengths. Rspec-astro tutorials show how this is done as illustrated in this next screenshot. Line spectra for hydrogen Balmer lines are superimposed on the image and we see that they coincide directly with dips in the observed spectra. This allows the direct assignment of pixel locations to known wavelengths.
 |
| Using dips in the observed spectra to identify spectral lines (Source: www.rspec-astro.com) |
But until the clouds go away, we will not be seeing Vega or any stars this week.
Until next time,

No comments:
Post a Comment