Well this week has been pretty spectacular in terms of good observing weather and the marine layer has gone missing at night with our really warm temperatures. Last time I mentioned that I had just received the repaired AVX mount from Celestron and was eager to get
going again with learning better alignment skills. But first, the mail and other activities.
going again with learning better alignment skills. But first, the mail and other activities.
As you know, our trip to Mt. Wilson was cancelled again for the third time and OCA Mt. Wilson Coordinator, Michelle, has been busy rescheduling all of our group, unfortunately due to scheduling conflicts and unavailable dates, our date for Mt. Wilson has now been pushed out to next spring. Darn, we've been waiting for this event for a long time and now have to wait even longer. At least Resident Astronomer Peggy and I were able to tour the Big Bear Solar Observatory last week, but still want to observe with the 60-inch scope. Ok, Michelle, we are still waiting and thank you for your dedication.
Last Friday, we met up with Amateur and Accordian Expert, Mike, at Jason's Near the Circle, for dinner before going up the street to Chapman U for the OCA monthly meeting. Thank you Mike. We enjoyed the evening and enjoyed the speaker, who did a great job of going over "how big is the universe?" In addition, Don McClelland, did the "what's up" presentation and demonstrated a version of Sky Safari Pro software, which I found so versatile that I downloaded my own copy. Now, I get Ipad alerts as to what's up. I got one alert for the ISS going overhead and went outside and sure enough there it was brightly lit up in the evening sky. Thank you Don.
Finally, with no marine layer, I practiced some polar alignment and was able to get a good alignment. Now, I've been spoiled with viewing through the Liveview LCD screen of my camera and hardly ever use just any eyepiece, but there are no cross hairs on my camera display. So, previous alignments, I was just sort of guessing when the target was at screen center. The last practice session, I made a little frame that slips over the LCD display and now I slew the scope to get good alignments. I don't know why it has taken me months now to recognize some of the final needed steps to do a good polar alignment. I know that I'm mostly the cause of poor alignments, because as an (retired) engineer, I hardly ever read the mount operating manual all the way to the end. But, yes, there the instructions were right there in the manual. I think it was a poor manual, but at the same time it probably should have had a WARNING! GEORGE, THIS SECTION IS ESPECIALLY IMPORTANT FOR YOU! For months now I've struggled with just doing the polar alignment as the first action by waiting till I could spy Polaris with my own little eye, but that is not necessary if you just read the instructions. The AVX approach, which probably applies to other mounts as well, is to do a close alignment to the North Pole and then after doing a two-star alignment and one calibration star, then pick any convenient alignment star, not necessarily Polaris and finish off the alignment. The mounts hand control then instructs you to physically move the altitude and azimuth setting knobs so that the selected star is just exactly centered. With this step the mount automatically corrects for any initial misalignment. Now when I take a long exposure (30-300 seconds) I see minimal star trails and the goto capability of the mount is quite good. So, if I had only known what question to ask the other more expert amateurs, I could have made this "discovery" months ago. I hope you all have had faster learning than that.
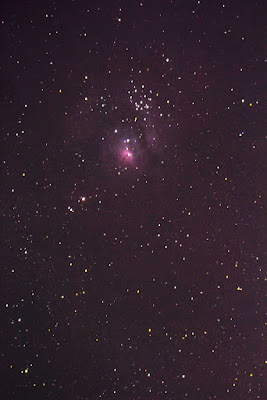
So, I tried the better alignment out on M8, M13 and M57 just to check out what the goto was like. See the attached photos. Hey, they don't look too bad!
 |
| M8 image taken at Palmia Observatory |
 |
| M13 image taken at Palmia Observatory |
 |
| M57 image taken at Palmia Observatory |
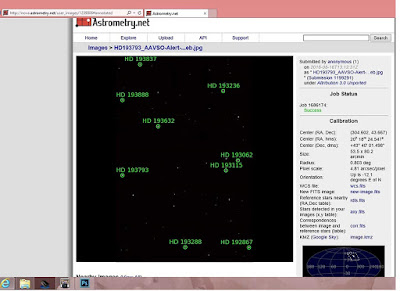
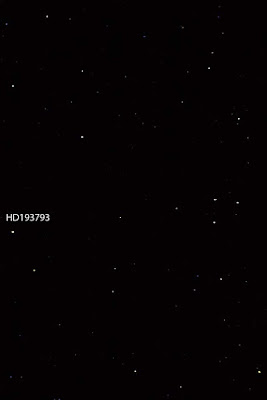
Now, with this verification that the goto capability, at least got the target in the camera frame, I wanted to get back to trying to capture the AAVSO alert for amateurs to measure the light curve for the variable star in Cygnus, HD193793. Now, I am not yet ready to measure the light curve and I had no idea whatsoever which of the stars in Cygnus was the target star, but with its published right ascension and declination values (RA=20 20 28, Dec=+43 51 16.3), all I had to do was enter those coordinates into the aligned scope and wait and watch what happened. I took an image at that location and uploaded the image to astrometry.net, which provides a service of identifying the sky location of the image. See attached screen shot showing that, yes indeed, HD193793 was in the camera field of view, not exactly centered, but still there it was. Next, take a look at my actual camera image, where I have identified the target star.
 |
| Using Astrometry.net to confirm the dim object in camera frame really is HD193793 |
 |
| Image of HD193793 taken at Palmia Observatory |
Wow, this has been a big step forward for me and means if I just read the operating manual and listen and learn, the real capability now available to amateurs can be realized. What say you, isn't this just the story of our amateur experience where trials and tribulation can result in success, before we just give up and take up golf?
I also tried to view other dimmer Messier objects like M110, M31 and M32, but they didn't quite come out the same quality. Probably, because these dim objects are swallowed up by the background city lights. Now all of these photos were taken here at the observatory, and just in case you think we are located in an ideal location for observing, check out the attached photo showing the shadow of Resident Astronomer George and scope. Yes, lots of light around, but at least I'm not relying on any dark adapted eyes for my viewing.
 |
| City lights bright enough to show shadow of resident astronomer |
So, yes, it was a pretty good night for alignment success and viewing, but on review, why were the target objects not centered directly in the camera image? Well, on review there are probably a lot of reasons. Some reasons include: (1) use more calibration stars, (2) check for telescope cone error, (3) atmospheric refraction, (4) epoch 2000 coordinate displacement in 2016 due to precession of the equinoxes, and other and miscellaneous errors including operator error. We will just have to keep exploring what happened and continue with one step backward and hopefully two steps forward.
When I was packing everything up, I noticed that my cross hair alignment tool was a little flimsy, which might have contributed to some error, so I strengthened that up. Also, I noticed that the focuser assembly was quite loose and allowed the star diagonal to jiggle about. Now , the assembly is supposed to be able to rotate so the star diagonal can be rotated, but it shouldn't jiggle about in the other axes. This error alone, I estimated could introduce a dozen or so arc minutes of error. We will just have to wait for next observing session to check out what happens.
If you are interested in things astronomical or in astrophysics and cosmology
Check out this blog at www.palmiaobservatory.com

No comments:
Post a Comment